You can easily insert various nodes, such as Email, SMS, Delay, Path, Split, and Candidate Matching, into an existing workflow between two nodes without having to delete or recreate parts of the workflow. When adding a Split Node, a modal prompts you to select where to place the existing output node, either as If or Else (Rest of all).
These are classified into:
- Regular Node (Email, SMS, Delay, Path, Candidate Match Node)
- Split Node
Prerequisites
- The workflow must have at least two nodes already in place.
- The insertion point must be between nodes with a single input and single output (i.e., not between a Split Node and its subsequent branches).
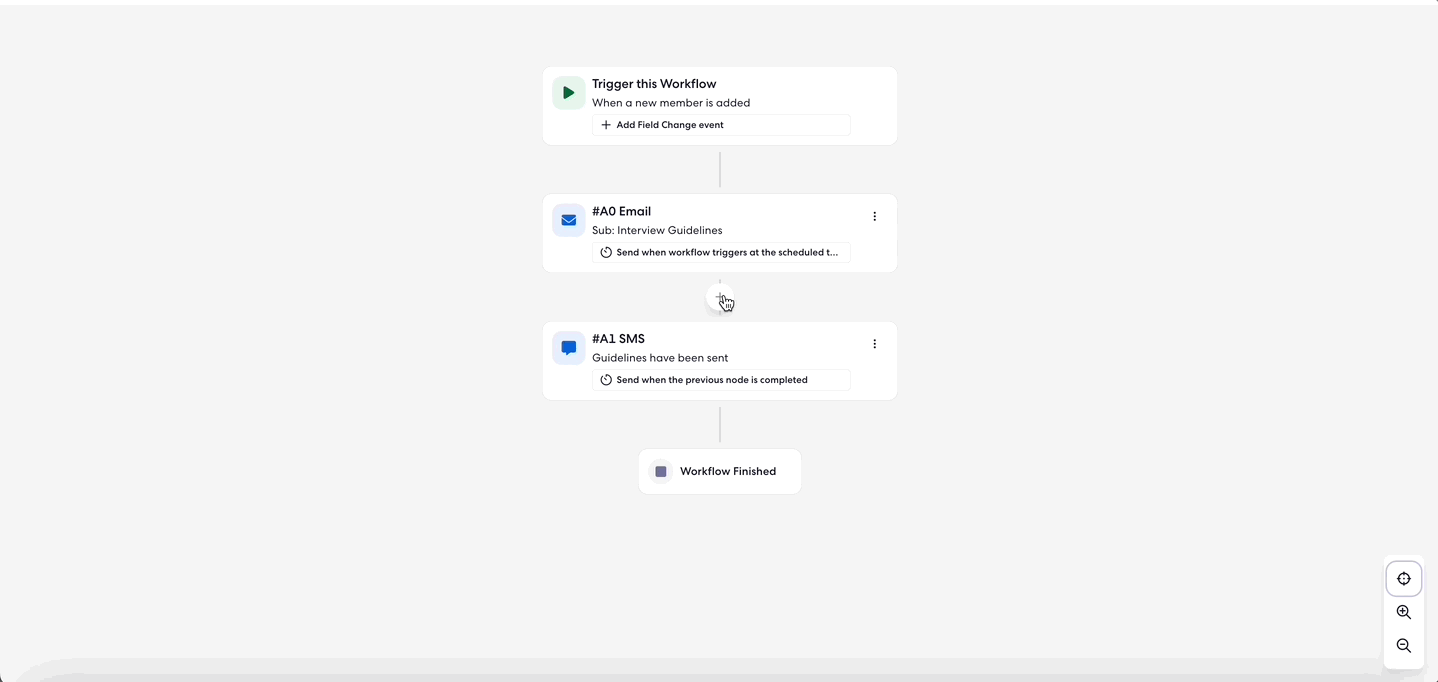
Adding a Regular Node
You can follow the steps given below to add a regular node:
- Click on the "+" icon between two nodes in your existing workflow.
- Select the type of node you want to add (Email, SMS, Delay, Path, CM Node).
- Configure the node with the necessary details (e.g., email content, SMS message, delay duration).
- Click Save to confirm the addition. The node will only appear in the workflow after you have saved it. If the process is canceled, no changes will be made to the workflow.
Note: The system will validate, based on the validation framework, whether the selected node type can be added at the chosen position.
Example Scenario:
You have an existing workflow with an Email Node followed by a Delay Node. Then, you decide to add an SMS Node between the two so you follow the above steps to add the SMS node. After the SMS Node is added to the workflow, the sequence will be Email → SMS → Delay.

Adding a Split Node
You can follow the steps to add a split node:
- Click on the "+" icon between two nodes in your existing workflow.
- Select Split Node from the list of node types.
- A window will appear asking where you want to move the existing output node (the node following the current insertion point).
- Choose the branch (If or Else (Rest of all)) for the existing output node.
- Configure any additional details for the Split Node (e.g., conditions for branching).
- Click Save to confirm the addition.

Example Scenario:
You have an existing workflow with an Email Node followed by an SMS Node and decide to add a Split Node between them. You follow the above steps and insert the split. The system prompts you to decide where the SMS Node should be placed (e.g., If or Else (rest of all)). You select If, configure the conditions, and click Save. The workflow is updated to Email → Split Node → SMS.